Six Fruit Vegan Crumb Pie

Sometimes I like to just make it up as I go in the kitchen. It can be fun to experiment and see what you come up with! I had some leftover pie crust after making a pot pie, and I had a variety of frozen, fresh, and dried fruit. I didn’t have enough of any one or even any two fruits to make a pie, but altogether I had just enough. So I went with the ‘kitchen sink’ way of cooking – throw in everything but the kitchen sink. I had frozen strawberries, frozen mixed berries (blueberries, raspberries, strawberries), frozen mango, a fresh apple, and dried apricots.

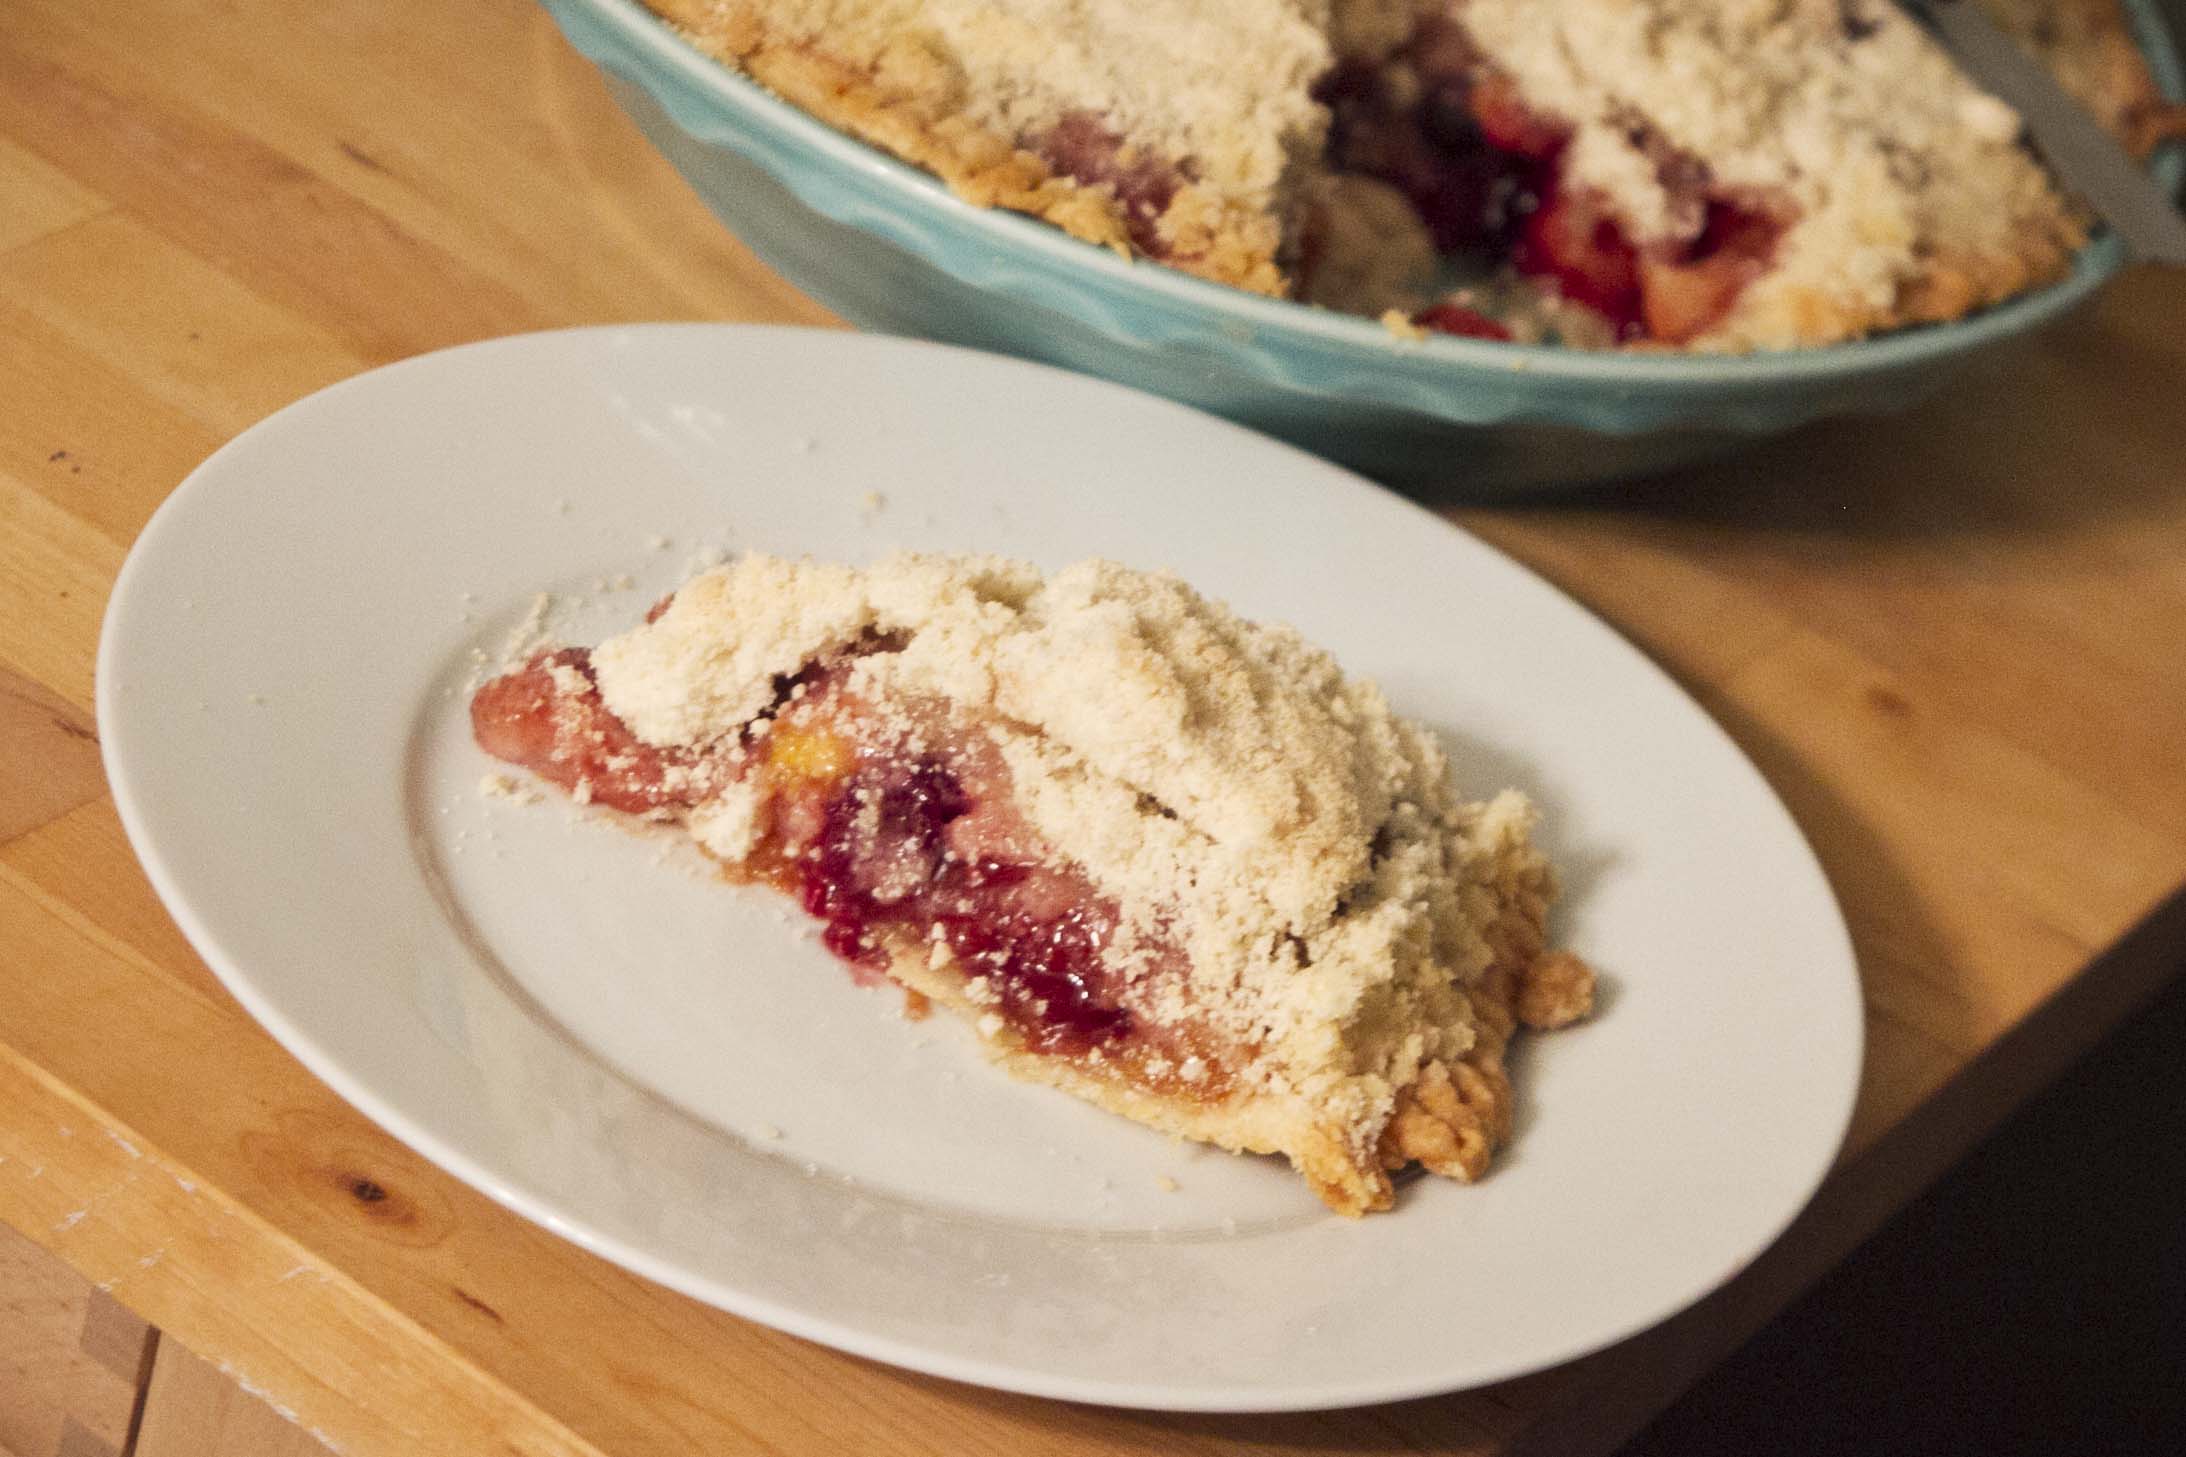
I topped it off with some crumb topping and the result was surprisingly yummy! If one fruit makes a tasty pie, then six make an extra tasty pie. The flavors blended really well together, and I think I’ll be mixing fruits in pies more often!

Kitchen Sink Six Fruit Pie

Ingredients:

1 batch of pie crust for a crust on top and bottom, or half a batch for a crust on bottom and crumb topping on top
4-5 cups of fruit ( I used 2 cups of frozen berries, 1 cup of frozen mangos, 1 fresh apple, and about 1 cup of dried apricots)
1/2 cup sugar
1 1/2 Tbsp cornstarch
1 1/2 tsp cinnamon
pinch of nutmeg
pinch of salt
zest of 1 lemon

Crumb Topping Ingredients:

1 cup flour
1 cup sugar
1/4 cup vegan butter

Directions:

  • Prepare your dough and refrigerate for at least 1/2 an hour before using. Preheat the oven to 350°.
  • If you’re using frozen fruit, defrost it. Chop the fruit and place it in a large bowl. Add the sugar, cornstarch, cinnamon, nutmeg, salt and lemon zest. Stir until all of the fruit is evenly coated.
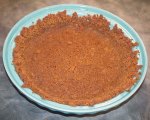
  • Prepare the crumb topping. Place the flour and sugar in a bowl. Cut in the butter using a pasty blender, fork, or even your hands. You could also use a stand mixer on a low setting until it’s reaches a crumbly texture. Don’t over mix or it will eventually turn into dough rather than crumb.
  • If you made a full batch of pie dough, split it in half and roll out one half on a floured surface. It should be rolled to about 1/4 inch thickness. Pick up the dough using the rolling pin to support it and place it in the bottom of the pie dish. Trim excess dough and crimp the edges.
  • Pour your fruit mixture into the pie crust and spread it out evenly. Top the pie with the crumb topping. Or, if you’re putting a crust on top, roll out the crust, place it on top of the pie, trim the excess, and crimp the edges. You’ll also want to poke a few holes in the top crust with a fork so steam can vent out.
  • Bake the pie at 350° for 45-60 minutes. The crumb should be starting to turn golden, and the fruit juices should be bubbling around the edges.

Vegan Shoofly Pie

My girlfriend, Laura, grew up in Central Pennsylvania, and she has PA Dutch roots going back to the 1600’s. Her favorite pie is Shoofly pie which is a traditional PA Dutch recipe featuring molasses. I had never had shoofly pie before, but wanted to try making a vegan shoofly pie like the ones she had growing up. There are different variations on the shoofly pie including wet bottom and dry bottom. Laura said this pie is very similar to the ones she grew up with and that it falls somewhere between a wet bottom and a dry bottom shoofly pie.

Shoofly Pie

Having never had shoofly pie before, it tasted similar to gingerbread minus the ginger since the molasses bottom and crumb topping merge and create a cake-y layer in the middle. Although pies are usually best warm, I actually liked this pie better after it sat in the fridge for a day or two. The molasses firm up and I like the texture after the layers have settled a bit. This makes it a perfect recipe to make a day ahead of time for Thanksgiving or Christmas! The molasses give it a flavor that just seems to fit with the fall/winter months when gingerbread, gingersnaps and other recipes with molasses are popular.

Shoofly Pie

Before we get to the recipe, I also wanted to share a list of upcoming craft shows where I will be selling my handmade fused glass including pendants, earrings, bracelets, pins, and ornaments. My brother, Don Morrison, will also be at these shows with me selling his fused glass and metal jewelry and glass dishes. It would be great to see you at a show! If you don’t live in the area, check out the jewelry I have posted on my Etsy Shop – The Creative Kat. I have many more pendants, earrings, and bracelets than I can list on Etsy, so if there’s something in particular that you’re looking for or you want to see other colors or designs, let me know!

K.Morrison.Flyer

And now, back to the Shoofly pie!

Ingredients:

Pie Crust – make a full batch – you won’t need all of it, but half a batch wasn’t quite enough
1 1/4 cups flour
3 Tbsp Earth Balance vegan butter
3/4 cup brown sugar
1 tsp baking soda
2/3 cup boiling water
3/4 cup molasses
1 1/2 tsp Ener-G Egg Replacer Powder + 2 Tbsp warm water

Directions:

  • Prepare the pie crust following this recipe. Place the dough in the refrigerator for an hour before assembling the pie.
  • Preheat the oven to 375°.
  • Roll out the pie crust on a floured surface to about 1/4 inch thick. Place it in the pie plate, remove the excess dough, and crimp the edges. Set aside.
  • Break the vegan butter into small chunks. Prepare the crumb topping by combining the flour, brown sugar, and butter. You can use a stand mixer or mix it by hand using a pastry cutter. Mix it until it starts to stick together and look crumbly. Over-mixing will turn it into dough, so keep an eye on it.
  • Whisk together the Ener-G Egg Replacer powder and warm water and set aside. Bring the water and baking soda to a boil. Remove from heat and whisk in the molasses and egg replacer mixture.
  • Pour the molasses filling into the crust. Then sprinkle the crumb topping evenly over the filling. Most of the crumb will sink into the molasses filling, but some will stay dry on top. This is what creates the layers of molasses, cake-y middle, and crumb top.
  • Bake the pie for 45-55 minutes. Let it cool and serve warm or cold based on your preference. Enjoy!

Fourth of July Rhubarb Peach Crumble

Happy Fourth of July! It kind of snuck up on us this year. Since it’s been raining nearly every day for the last month it doesn’t feel like summer yet. It’s been hot, but it feels like an extended rainy spring. I can’t believe it’s July already!

Rhubarb Peach Crumble

We made a rhubarb and peach crumble to celebrate the holiday. If you’re looking for a last minute dessert recipe, this one is really yummy and pretty simple to make. The peaches and rhubarb provide a sweet and tart combo (like strawberries and rhubarb) that compliments the sweet crumble topping.

Rhubarb Peach Crumble

If you’re looking for something more patriotically colored (and chocolatey) try my Chocolate Peanut Butter Pie with Fresh Berries. Add a little vegan whipped cream or vanilla ice cream and you’ll have red, white and blue!

Filling Ingredients:

3 fresh ripe peaches (about 2 1/2 – 3 cups)
3-4 stalks of rhubarb (about 3 cups)
1 lemon (juice and zest)
3/4 – 1 cup of sugar
1/4 cup flour

Crumble Topping Ingredients:

1 cup flour
1/2 cup packed brown sugar
1 tsp cinnamon
1/2 – 3/4 cup vegan butter

Directions:

  • Preheat the oven to 350°. Lightly butter the bottom and sides of an 8 inch baking pan.
  • Peel and chop the peaches into about 1 inch pieces. Chop the rhubarb into small pieces. Zest and juice your lemon.
  • Place the fruit, lemon juice, and lemon zest in a mixing bowl. Add the sugar and flour and mix until the fruit is evenly coated. I started with 3/4 cup of sugar and then tasted the mixture. It seemed pretty tart so I added a little more. Adjust the sugar to your own tastes. The sugar and flour will started to mix with the juices from the fruits.
  • In a separate mixing bowl, combine the flour, brown sugar, and cinnamon for the crumble topping. Add the vegan butter in small chunks. Use a pastry blender or fork to cut the butter in. (Sometimes your hands work well too!) The topping should come together in a crumbly consistency, but not as a big ball of dough.
  • Place the fruit mixture in the baking dish. Sprinkle the crumble topping evenly over the fruit.
  • Bake the crumble for 40-45 minutes until the fruit filling is bubbly and the crumble topping is golden brown.

Jewish Apple Cake

When I was in college, I spent summers working in a bakery at a farmer’s market. We made all kinds of baked goods…pies, cookies, muffins, sweet breads. However, my favorite recipe from the bakery was the Jewish Apple Cake. It wasn’t a vegan bakery, and I wasn’t vegan until the end of my time working there. Luckily though, the Jewish Apple Cake is easily veganized by using Ener-G Egg Replacer Powder instead of eggs. The cake didn’t rise up quite as much as it would have with eggs, but the texture was still just like the original.

Jewish Apple Cake

As I was enjoying this cake I realized it would probably work really well with other fruits. Peaches came to mind since they’ll soon be in season. I will definitely be trying this out soon with a peach filling! This recipe makes a big cake, so it’s perfect for sharing. The cake stays moist in the middle and has a nice crispy top from the cinnamon sugar. It’s really a simple, old fashioned recipe, but sometimes the simplest things are the yummiest!

Jewish Apple Cake

Jewish Apple Cake Recipe:

6 Granny Smith Apples
1 tablespoon cinnamon
5 tablespoons sugar
2 3/4 cups flour, sifted
1 tablespoon baking powder
1 teaspoon salt
1 cup vegetable oil
2 cups sugar
1/4 cup orange juice
2 1/2 teaspoons vanilla
2 Tbsp Ener-G Egg Replacer Powder mixed with 8 Tbsp warm water

  • Preheat the oven to 350°. Grease and flour a 9 inch Bundt pan.
  • Peel, core, and thinly slice your apples into wedges.
  • In a small bowl combine the cinnamon and sugar and set aside.
  • In a mixing bowl, combine the flour, baking powder, and salt. In a separate mixing bowl whisk together the Ener-G Egg Replacer Powder and the warm water. Then whisk in the oil, orange juice, sugar, and vanilla.
  • Mix the wet ingredients into the dry until well combined.
  • Pour a third of the batter into the bottom of the pan. Sprinkle a generous layer of apples on the batter. Sprinkle cinnamon sugar on top of the apples. Layer another third of the batter on top, then another layer of apples and cinnamon sugar. Spread the remaining batter on top. Place just a few apple pieces into the batter and sprinkle the top with cinnamon sugar.
  • Cover the Bundt pan loosely with tin foil. Bake for 1 hour. Remove the tinfoil and bake for another half hour until the top is golden brown and a skewer or cake tester inserted into the cake comes out clean. Covering the cake for the first hour helps to keep the apples on top from burning.
  • The cake slid out of my Bundt pan pretty easily, but if you can’t get it out, you can always serve it from the pan. It does make a nice presentation when it’s out of the pan though!

Virtual Vegan Potluck – Chocolate Peanut Butter Pie with Fresh Berries

Welcome to the third Virtual Vegan Potluck! It’s been great to see this grow so much each time! In case you just happened upon my blog and don’t know what the Virtual Vegan Potluck is, it’s a blog circle of recipes by vegan and vegan friendly bloggers. You can start at the beginning by going to Vegan Bloggers Unite, or see the blogs before or after me in the potluck by following the Go Forward and Go Back links at the bottom of this post. I’m excited to be participating again, and I’ve brought one of my favorite dessert recipes to share!

This recipe originally came from Vegetarian Times many years ago, and I’ve made a few modifications to it over the years. This pie is pretty easy and quick to make, and it’s perfect for sharing! Who doesn’t love peanut butter, chocolate, and berries? I wish I could give each of you a slice in real life!

Chocolate Peanut Butter Pie

I make the crust from scratch because many store bought graham cracker crusts aren’t vegan. Most graham crackers contain honey, but Nabisco Originals don’t. Making a graham cracker crust from scratch isn’t too hard and doesn’t take much time. I think they’re tastier than the store bought versions too! You can also use ginger snaps, vanilla or chocolate wafer cookies, or any other type of cookie or cracker that is dry and crumbly to make a crust. That’s one of the things I like so much about this pie, it’s easily customizable. In addition to changing the flavor of the crust you could substitute almond butter or cashew butter for the peanut butter, and you could top the pie with anything you like – nuts, vegan whipped cream, bananas, etc. Make it your own!

Graham Cracker Crust Ingredients:

1 1/2 cups graham cracker crumbs (about 10-11 whole crackers)

1/4 cup sugar

dash of salt

1/2 tsp cinnamon

5 Tbsp melted vegan butter (Earth Balance or organic Smart Balance)

Graham Cracker Crust Directions:

  • Preheat the oven to 375°.
  • Place the graham crackers in a ziploc bag and seal it shut. Use a rolling pin or a wooden spoon to crush the crackers into crumbs.
  • Pour the crumbs into a mixing bowl and add the sugar, salt, and cinnamon to the crumbs. Stir until combined.
  • Melt the vegan butter and drizzle it over the crumbs. Mix it with a fork until combined.
  • Pour the crumbs into a 9 inch pie plate. Press them into the bottom of the pie plate and up the edges. They should stick together. If any holes form, make sure you fill them in.
  • Bake the crust for about 10-15 minutes. If the sides of the crust slouch down after baking, gently use the back of a spoon to push the crust back up the sides of your pie plate. Let the crust cool fully before putting the filling in.

Ingredients for Pie Filling:

  • 1 cup semi-sweet chocolate chips
  • 1 12-oz. container silken tofu
  • ½ cup pure maple syrup
  • 1 cup creamy peanut butter
  • berries for the top

Directions for Pie Filling:

1. In a food processor or blender, combine the silken tofu and maple syrup and blend until smooth. Add the peanut butter and blend it again until it’s smooth.

2. Melt the chocolate chips, either using a double boiler or heating it in 30 second intervals in the microwave until melted. Stir the chocolate frequently as it melts. Add the melted chocolate to the food processor or blender and blend until smooth. Pour the filling into your cooled graham cracker crust. Smooth the top out and refrigerate the pie at least 20 minutes to firm up.

4. Place the berries on top (or use your topping of choice). You can use fresh berries when in season or thawed frozen berries other times of the year. Keep the pie refrigerated. Enjoy!

Be sure to check out the rest of the potluck by following these links! The blog before me is Mama et de Bebe Hawk and the blog after me is Deerly Beloved Bakery. You can also start at the beginning by visiting Vegan Bloggers Unite!

go_bck-300x257 go_forward-300x243

Vegan Ice Cream Cake

Growing up, my mom would make me ice cream cakes for my birthday sometimes, and I wanted to try recreating that in a vegan version. I often make my own vegan ice cream and I have a really yummy chocolate cake recipe, but I wanted to try making a yellow cake. I’m so partial to chocolate cake, that I had actually never made a vegan yellow cake. I started hunting around for recipes and one in particular popped up in a few different places. I’m not exactly sure where it originated, but I followed the recipe from the blog The Ramblings and Recipes of a Vegan Goddess. It baked perfectly, rising up nicely, but not too high so it was still easily stack-able. This will definitely become my go-to recipe when I want to make a yellow cake.

I also followed the butter-cream icing recipe from that blog post. I added in some lemon extract and it tasted good and did the job, but it came out more like a thick glaze or thin icing than I was expecting. I probably need to adjust the ratio of powdered sugar to vegan butter next time, or I’ll use the chocolate peanut butter frosting that I make for the Moosewood Chocolate Cake. If you have a good vegan icing recipe that you like, feel free to post it in the comments. I haven’t found a basic vanilla one that I love yet.

For the ice cream filling, I made a basic vegan ice cream base and added in fresh strawberries and chocolate. The fresh strawberries made the texture of the ice cream a little too icy, but fresh fruit tends to do that. It was still yummy though! I would recommend using my Mint Chocolate Chip, Coffee Chocolate Chip, or Almond Pistachio recipes, or invent your own flavor! You could also use a store bought vegan ice cream.

Ingredients for Ice Cream Layer:

2 cups soy creamer
1 cup soy milk divided
2 tablespoons arrowroot powder
3/4 cup of sugar
1 Tbsp vanilla
Any extracts or add-ins you choose

Directions for Ice Cream Layer:

  • Note that the ice cream needs to be made the day before so it can be frozen into the same shape as the cakes over night.
  • Mix 1/4 cup of soy milk with 2 tablespoons of arrowroot powder and set aside.
  • Heat up the remaining soy milk, soy creamer, and sugar over medium heat until boiling.
  • Remove from heat and add the vanilla and any other extracts you choose. Then add the soy milk and arrowroot powder mixture. The liquid will thicken because of the arrowroot powder.
  • Put the mixture in the fridge for at least 2-3 hours to fully cool. Freeze according to your ice cream maker directions. The bowl for the ice cream maker usually has to freeze over night before churning.
  • In the last few minutes of churning, add anything else you choose to create the flavor you want – for example chocolate chips, cookie dough, nuts, candy, etc. Line an 8 or 9 inch cake pan with parchment paper, and pour the mixture into the pan. Place it into the fridge overnight to firm up.

Cake Ingredients:

3 cups flour
2 cups sugar
1 tsp baking soda
1 tsp salt
2 cups cold water
1 cup vegetable oil
1 Tbsp + 1 tsp vanilla extract
4 Tbsp lemon juice

Cake Directions:

  • This recipe makes two 8 or 9 inch cakes for layering. Preheat oven to 375°. Line the bottom of two 8 inch or 9 inch cake pans with parchment paper. Lightly oil or grease the top of the parchment paper and sides of the pans.
  • In a large mixing bowl, combine the flour, sugar, baking soda, and salt. In a small bowl, combine the water, oil, and vanilla extract. Add the wet ingredients to the dry ingredients and mix until well combined.
  • Once the batter is mixed, add the freshly squeezed lemon juice. The lemon juice won’t make the cake taste lemony. The acidity of the lemon juice interacts with the baking soda to help the cake rise. Give the batter a quick stir to combine the lemon juice and then immediately pour the batter evenly into the two pans.
  • Bake the cakes for 25-30 minutes. They are done when a toothpick or skewer inserted in the center of the cake comes out clean. Allow the cakes to cool in the pan for 15-20 minutes. Then, gently turn the pans over, supporting the cake with your hand, until the cake comes loose from the bottom of the pan. Flip it over onto the surface you want to ice the cake on. Gently remove the other cake from the pan and place it onto a plate or cooling rack with the bottom facing up. This will make it easier to layer the cakes once they’re cool.
  • Allow the cakes to fully cool. You can put them in the fridge to speed up the process. You don’t want them to be warm since you will be layering ice cream in the middle and it will melt.

Assembling the Ice Cream Cake:

  • While your cake layers are cooling, make your icing. Choose your own favorite icing recipe, try The Vegan Goddess’ recipe, or if you want a chocolate frosting try the Moosewood recipe.
  • Once the layers are completely cool, you are ready to start assembling. Your first cake layer should be on the tray or surface that you want to use to ice and serve the cake. If the cake top is very rounded and puffy, you might want to slice the top off to make it flat. When I made this recipe, however, this wasn’t necessary. Pop the ice cream layer out of the cake pan, using the parchment paper to help you pry it out if needed. Place the ice cream layer centered on top of the bottom cake layer. Place the top cake layer on top of the ice cream layer.
  • Ice the top and sides of the cake. You can decorate the top however you like. I decided to keep it simple, and I dusted some cocoa powder over the top and placed a strawberry in the middle. Keep the cake in the freezer until you’re ready to serve it. If it melts, the ice cream and frosting will run down the sides, so you don’t want to leave it out too long.

Vegan Pie Crust Recipe

Homemade pie crust is one of those things that can be intimidating to make the first time, but it’s actually not that hard. I got a new pie plate and a pie bird for Christmas, so I wanted to try them out. I veganized a pie crust recipe from The Joy of Cooking to make an apple pie a little while back and the crust came out perfectly. Everyone has their own way of making pie crust, but this one works really well for me.

Growing up, my mom always made her own pie crusts, and she’s really good at it. Maybe I’m just spoiled, but I think homemade pie crust is so much better than frozen store bought crust! It’s really worth the effort to make it yourself. Try out this recipe with your favorite filling. It makes enough for the top and bottom crust for a 9 inch pie plate. It could also work as the top of a pot pie if you added in some savory spices like thyme or rosemary.

Unbaked Pie

A few tips before you start… The recipe calls for using ice cold water. The reason that you want cold water is so the shortening and vegan butter don’t melt in the dough. On that note, the shortening and vegan butter should also be cold when you start working with them. Don’t leave the vegan butter out to soften up. Another important thing is not to overwork the dough or it will get tough. Just do enough to get everything combined. The amount of water you need to add can also vary greatly depending on a lot of different factors. Just pay attention to the dough and only add a little at a time until you have just enough. If you’re wondering what a pie bird is, it’s a little ceramic bird that is open on the bottom and the beak. It helps vent steam out of your pie while it bakes. They help prevent the filling from boiling up and breaking through the crust.

If you want some very detailed and more scientific info about making pie crust and the various factors that come into play, check out this post on Serious Eats called The Food Lab: The Science of Pie Dough.

Baked Pie

Ingredients:

2 1/2 cups all purpose flour
1 tsp vegan sugar
1 tsp salt
1/2 cup Spectrum vegetable shortening
1 cup vegan butter (Earth Balance or Smart Balance) or another cup of vegetable shortening
1/3 + 1 tbsp (and maybe more) of ice cold water

Directions:

  • In a large mixing bowl, combine the flour, sugar, and salt. Stir so they are well combined.
  • Break the vegan butter and shortening into chunks and add them to the dry ingredients. Using a pastry cutter or fork, cut the shortening into the dry ingredients. The mixture will start to form crumbs, with some of the shortening and vegan butter remaining in about pea size clumps. Don’t over mix it. It should be dry and crumby, not pasty like a dough or batter.
  • Slowly drizzle 1/3 cup plus 1 Tbsp of ice cold water over the mixture. Using a spatula, gently cut the water into the mixture so it’s evenly distributed. It will start to form into balls of dough that should stick together if you press them together. If the dough won’t come together, continue to add ice cold water 1 tbsp at a time until it does. The dough should be a little on the dry and flaky side however, so don’t add too much water. You can use your hands or the spatula to gently coax the dough together. It’s not going to look smooth like bread dough. It will be a rougher texture. It’s okay to still see little bits of the shortening and butter in the dough. Don’t overwork the dough. Just do enough to get everything combined.
  • Separate the dough into two even balls and wrap them tightly in plastic wrap. Refrigerate them for at least half an hour, but it’s best to leave it several hours.
  • When you’re ready to use the dough, preheat the oven to 425°. Roll the dough out on a floured surface using a floured rolling pin until it has formed a circle big enough for your pie plate. If any holes form, patch them with extra dough. Using the rolling pin to support the dough, pick it up and place it flat in the pie plate. Pinch off excess dough that hangs over the sides.
  • If you’re using a pie bird, place the pie bird in the middle of the crust and fill the pie with your favorite fruit filling around the pie bird. The bird’s head should be sticking out of the top of the fruit. Then roll out the dough for the top in the same way you rolled the bottom. Lift it up with the rolling pin and place it on top of the filling. Cut a little x in the center of the dough so the head of the pie bird can peak through the crust. Crimp down the edges of the dough to form a seal, removing excess dough as you go. If you aren’t using a pie bird, you’ll want to poke the top crust with a fork 6-8 times around the top so the steam can vent.
  • Before baking the pie, I brushed on a little soy milk and sprinkled on some cinnamon sugar, but this is optional. I like the texture and golden color it creates on top though.
  • Bake the pie at 425° for 30 minutes, then lower the temperature to 350° and bake 30 to 45 minutes more. The top of the pie should look golden brown and you should see thick juice bubbling around the edges when it’s done. Pull the pie out of the oven and let it cool. Enjoy!

Quick and Easy Vegan Strawberry Shortcake

Don’t forget, today is the last day to sign up for the Virtual Vegan Potluck! I signed up for the Main Course Category. The list of participating bloggers is pretty long. Check it out if you haven’t already!

I’ve been moving to a new apartment these past two weekends, and in the midst of the move I needed to make a birthday cake. I had my sights set on Strawberry Shortcake. Normally I would just make one from scratch, but being a little tight on time, I decided to try out a vegan Cherrybrook Kitchen Yellow Cake Mix.

I have to say the cake turned out pretty well! It’s dense, which worked well for strawberry shortcake, since that traditionally has a more biscuit-y cake. The only problem I ran into was that the cake started to fall apart as I turned it out of the pan, so that derailed my plans of cutting it through the middle to create layers. I would buy this mix again though if I needed a quick vegan cake.

I topped the cake with Cherrybrook Kitchen Vanilla Frosting, which is also vegan and gluten free. It wasn’t quite what I was expecting. It’s more of a glaze than a frosting and has a very sticky consistency, kind of like the filling of a Cadbury Creme Egg. On it’s own I wasn’t fond of it, but once it was combined with all of the other elements of the strawberry shortcake it was good. I’m not sure that I would use it again though.

I added a little Soyatoo Soy Whipped Cream and some fresh strawberries. The soy whipped cream has a somewhat distinctive soy taste, which I wasn’t really fond of, but again, with all of the other elements combined it worked. I might try their rice whip version next time to see if that has a better taste.


Overall, each element combined together into a really yummy finished product despite some of their individual downfalls. Sticky, sweet, strawberry goodness!

Merry Christmas! Mincemeat Recipe with Cup Conversions

Merry Christmas! Since I’ve had a few days off for the holidays, my sister and I had time to try out the mincemeat recipe from the Frugal Feeding blog that I posted a little while back. I realized that all the measurements are in grams. I decided to post the recipe with conversions to cup measurements since I’m guessing most of my readers are in the US. This should make it a little easier for you to try this recipe out!

Ingredients

3/4 cup raisins
3/4 cup golden raisins
1/4 cup candied fruit peel
1/3 cup glace (candied) cherries
1 apple – chopped, leave peel on
zest of 1 orange
juice of 1 lemon
4 tbsp brandy
2 tbsp brown sugar
1/2 tsp cinnamon
1/2 tsp nutmeg
1/2 tsp mixed spice (most similar to pumpkin pie spice in the US)

Directions

  • Finely chop all of the fruit.
  • Place the fruit in a mixing bowl and add the orange zest, lemon juice, sugar, and spices. Mix well. Add the brandy to taste. Use at least 4 tbsp, but you can use more if desired. The alcohol helps the mixture keep longer.
  • Cover the bowl and let it sit for 3 days, stirring each day so the fruit evenly absorbs all the alcohol. You then have mincemeat ready to become a pie! Ours still has one more day to soak, so we’ll be baking it tomorrow!

Moosewood Vegan Chocolate Cake with Chocolate Peanut Butter Frosting

Today’s my mom’s birthday. Happy Birthday Mom! Over the weekend I made her a cake using a recipe from the Moosewood Restaurant in Ithaca, NY. This has become one of my family’s favorite vegan cake recipes.

You can find the recipe on the Vegetarian Times website, but I’ll post it here too. The chocolate peanut butter icing really is the biggest selling point of this recipe for me. I could eat that just by itself. I also like that the recipe calls for coffee in the cake. Coffee, chocolate, AND peanut butter? So good!

Cake Ingredients

  • 1 1/2 cups unbleached white flour
  • 1/3 cup unsweetened cocoa powder
  • 1/2 tsp. baking soda
  • 1/2 tsp. salt
  • 1 cup sugar
  • 1/2 cup vegetable oil
  • 1 cup cold water or chilled brewed coffee
  • 2 tsp. pure vanilla extract
  • 2 Tbs. cider vinegar

Chocolate-Peanut Butter Frosting Ingredients

  • 2 oz. unsweetened chocolate
  • 1/4 cup peanut butter
  • 3 to 4 Tbs. water
  • 1 tsp. pure vanilla extract
  • 1 cup confectioners’ sugar

DIRECTIONS

1. Preheat oven to 375°F. Generously oil 8-inch square or round baking pan. Dust with sifted cocoa, or line bottom of baking pan with parchment paper.

To make Chocolate Cake:

2. Sift flour, cocoa, soda, salt and sugar. In another bowl, combine oil, water or coffee and vanilla. Pour liquid into dry, and mix until smooth.

3. Add vinegar and stir briefly; baking soda will begin to react with vinegar, leaving pale swirls in batter. Without wasting time, pour batter into prepared pan.

4. Bake for 25 to 30 minutes. Serve cake from pan, or, when cool, transfer to plate.

To make Chocolate-Peanut Butter Frosting:

5. In heavy saucepan, melt chocolate over medium heat. Beat together peanut butter, water and vanilla until smooth. Beat in confectioners’ sugar, and add melted chocolate, mixing until blended. Spread frosting on cooled cake.